Are you planning on upgrading or getting a new phone or tablet? Most major carriers like AT&T, Sprint, Verizon, and T-Mobile will let you trade in your old iPhone or iPad for store credit. But you probably don’t want to hand over your contacts, emails, photos and other personal information on your device to a stranger. This tutorial will walk you through the process of backing up your old iPhone or iPad, how to erase iPhone data and how to move your old info to your new device. The procedure is exactly the same for iPhone, iPad and iPod Touch.
Requirements:
- iPhone
- 10 minutes of free time
Optional: Backup Your iPhone or iPad
It’s a good idea to backup your iPhone or iPad before you erase it forever. Even if you think you don’t need to save any of the info on the device, it’s still better to have a backup and not need it, than to need it and not have it.
Plug your iPhone, iPad or iPod Touch into your computer and open the iTunes desktop app. Use the backup option to save a copy of your device to your hard drive. A more detailed tutorial on how to backup your iPhone can be found here.
01) Open The Settings App
Find the Settings app on your iPhone and open it.
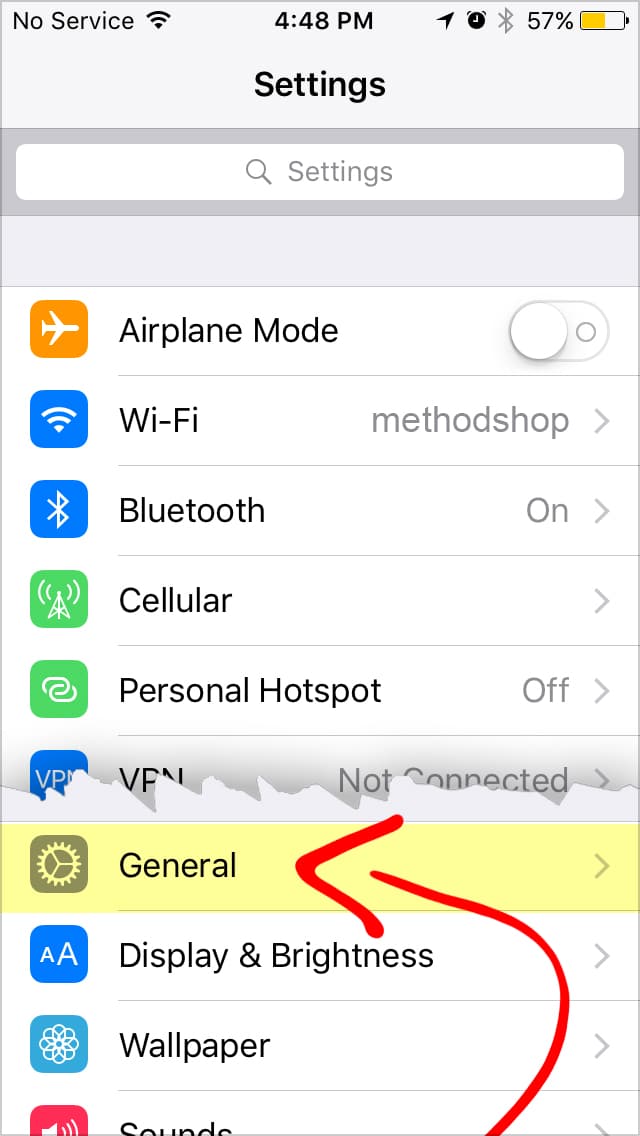
02) General
After you open the Settings app, scroll down and select the General option.
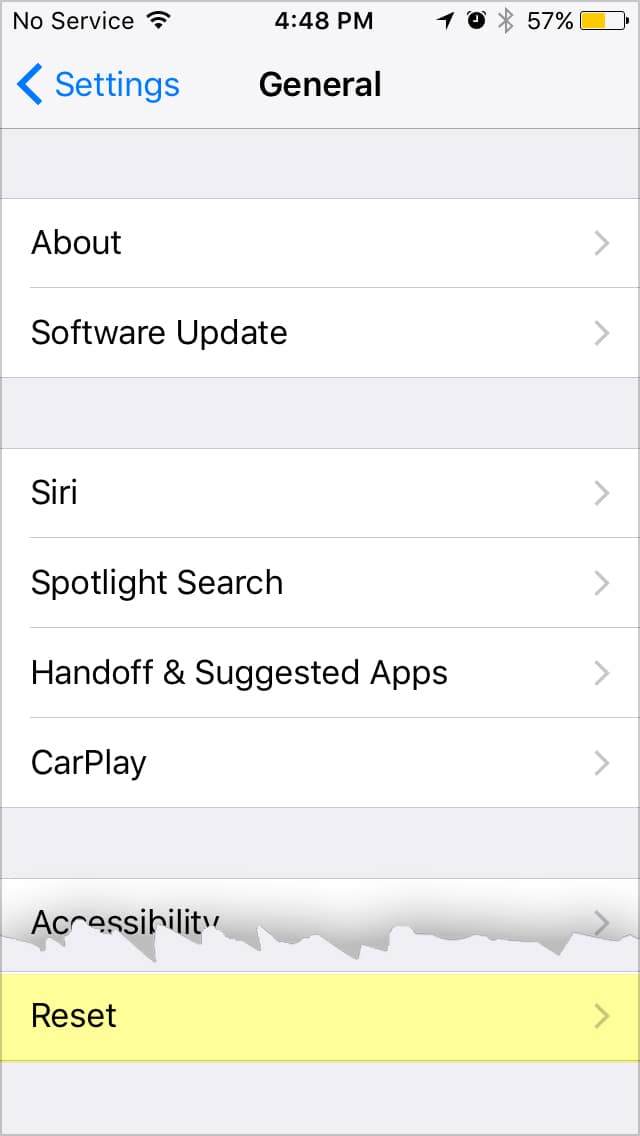
03) Reset
Scroll down to the bottom and select Reset. It’s all the way at the bottom.
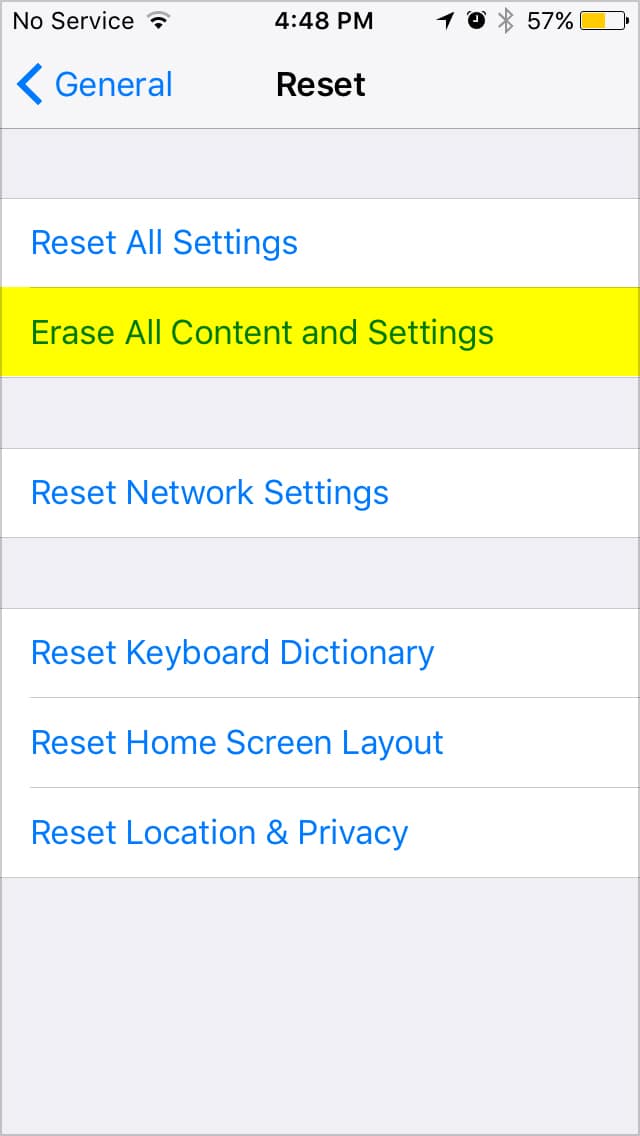
04) Erase All Content and Settings
Select Erase All Content and Settings.
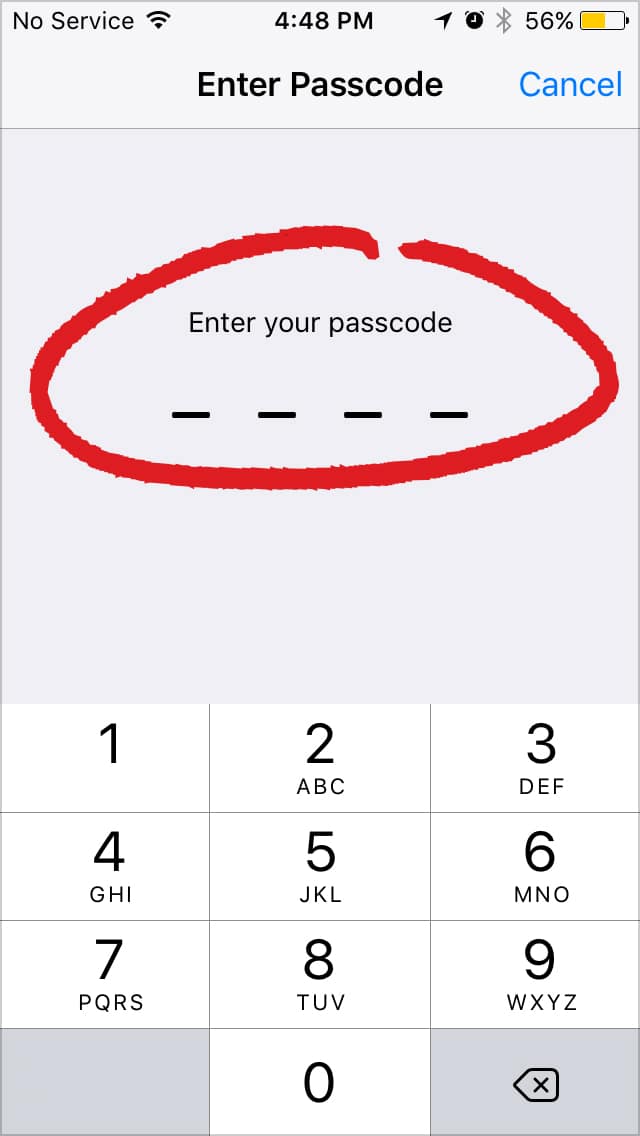
05) Passcode
Since this procedure can be very catastrophic, Apple adds several safeguards to prevent someone from accidentally erasing their phone. You will need to confirm your intentions to erase your iPhone several times.
Enter your iPhone’s passcode to proceed.
06) Erase iPhone
Just to confirm: “This will delete all media and data, and reset all settings.”
Select “Erase iPhone” to continue.
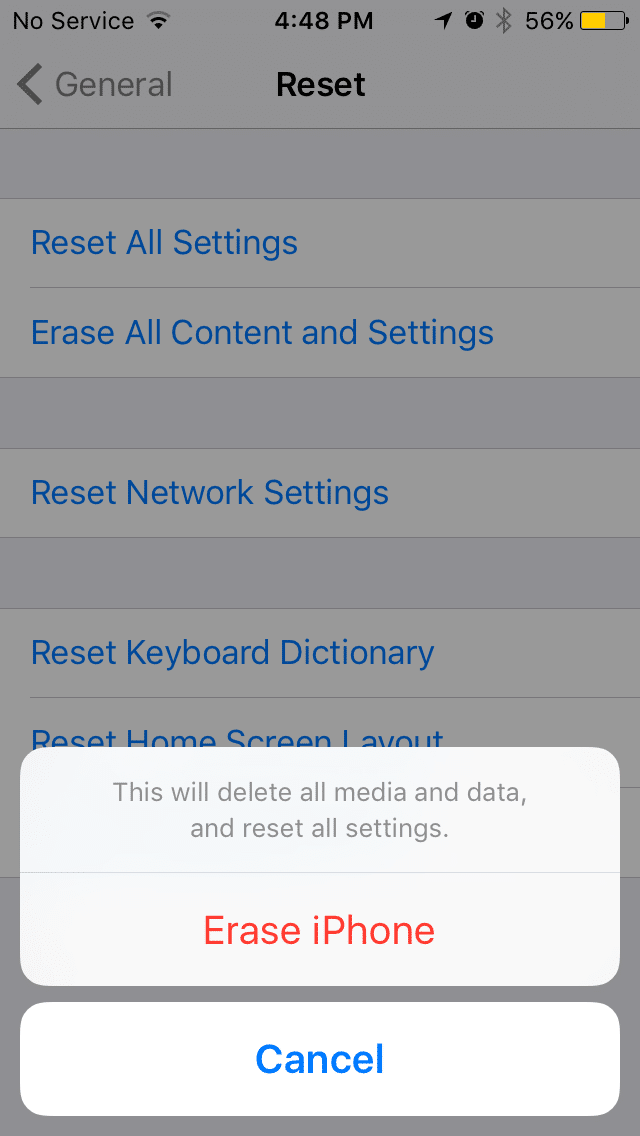
07) Erase iPhone Completely – Are You Sure?
Another safety check: “Are you sure you want to continue? All media, data, and settings will be erased. This cannot be undone.”
Select “Erase iPhone” again to continue.
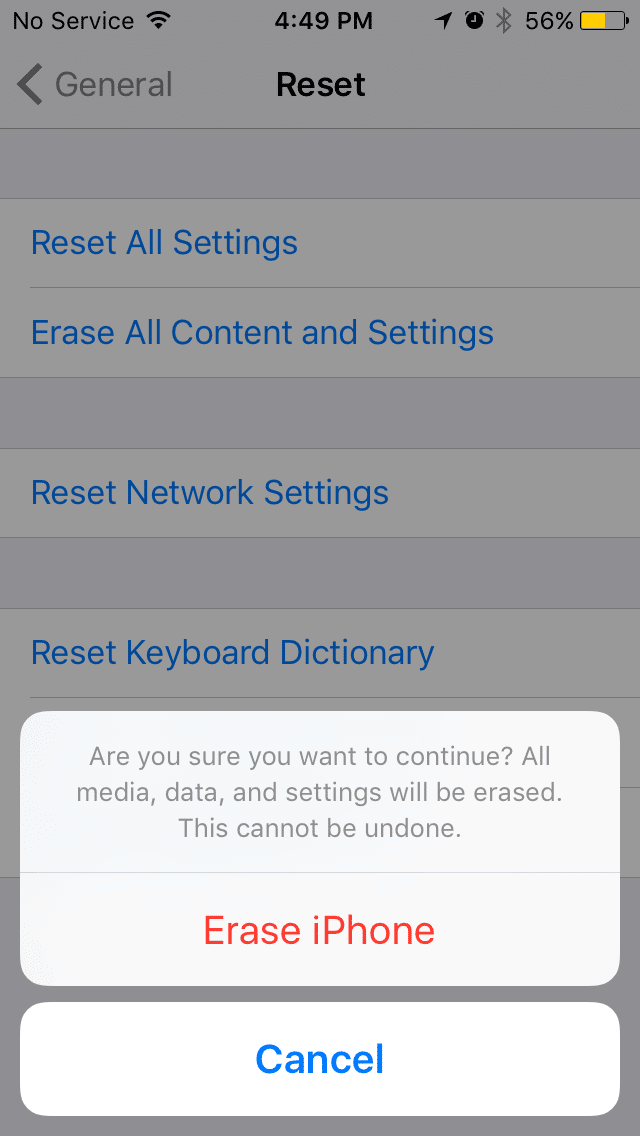
08) Enter Your Apple ID
Last chance to back out. The final step of this procedure is to enter your Apple ID password. This is for 2 reasons: 1) to confirm the erase procedure and 2) to remove this device from your Apple account.
09) iPhone Erase Everything & Reboot
Your screen should now go black while the operating system erases all of your information off the phone. You’ll see a white Apple logo and eventually, the setup screen will appear or the next owner to enter their information.
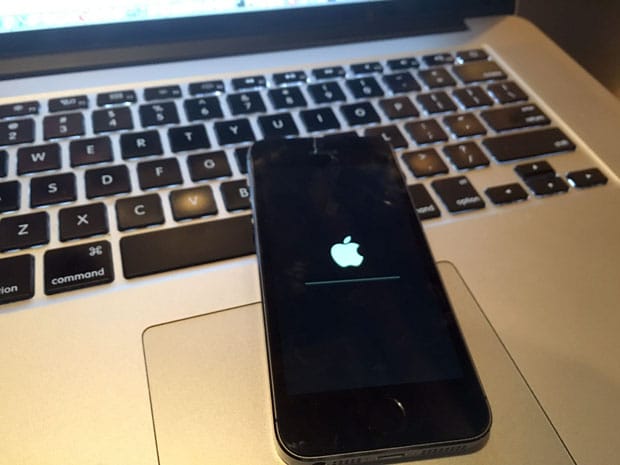
10) That’s It!
Congratulations! You just erased your iPhone and safely protected your personal information from falling into the hands of a stranger.
If you want to restore a backup of your old iPhone to a new phone, then take a look at this tutorial: How to copy information from your old iPhone to a new one.
We hope you found this tutorial useful. Please share it or leave a comment below if you have questions or suggestions on how to improve it.

Frank Wilson is a retired teacher with over 30 years of combined experience in the education, small business technology, and real estate business. He now blogs as a hobby and spends most days tinkering with old computers. Wilson is passionate about tech, enjoys fishing, and loves drinking beer.




 How To Keep Spam Email From Invading Your Microsoft Outlook Inbox
Leave a Reply
You must be logged in to post a comment.