One of the coolest parts of the Doctor Who TV series is how Doctor Who travels through time and space inside his trusty TARDIS.
Here’s how to make a custom Minecraft portal that looks like Doctor Who’s TARDIS. Not only will this Minecraft teleporter instantly transport you to distant locations on your Minecraft Map, but it has particle effects and sound effects too! Let’s do this!
Why Use The TARDIS As A Custom Minecraft Portal? – It’s Bigger On The Inside
My inspiration for this Minecraft tutorial is the TARDIS from Doctor Who. In case you aren’t familiar with the(Amazon link) Doctor Who series, the TARDIS is a time machine that looks like an obsolete telephone police box used between the 1920s-1990s in Britain.
Because the TARDIS is dimensionally transcendental, when you step inside the small blue police box, it’s famously bigger on the inside than the outside. With that in mind, using the Minecraft teleport function, you can make TARDIS police boxes throughout your Minecraft map that transport you back to a “home base”. And if you want to stick with the Doctor Who theme, then design your home base to look like the inside of the TARDIS.
Sound like a cool idea? Let’s go!
How To Build A Custom Minecraft Portal That Looks Like The TARDIS From Doctor Who (It's Bigger On The Inside) #Minecraft #MinecraftTutorial #DoctorWho #TARDIS #ItsBiggerOnTheInside Share on XEasy Tutorial: How To Build A Custom Minecraft Portal That Looks Like The Doctor Who TARDIS
There are many different ways to use the Minecraft teleport command. This tutorial uses the simple method of triggering actions using Pressure Plates. For more advanced options, please scroll down to the last section of this tutorial.
This Minecraft tutorial will probably take you 30-45 minutes to complete.
WARNING: Working with Minecraft Command Blocks can be dangerous. If you make a mistake, you could permanently trap yourself in an infinite teleport loop. Please backup your Minecraft world before proceeding.
Launch Minecraft
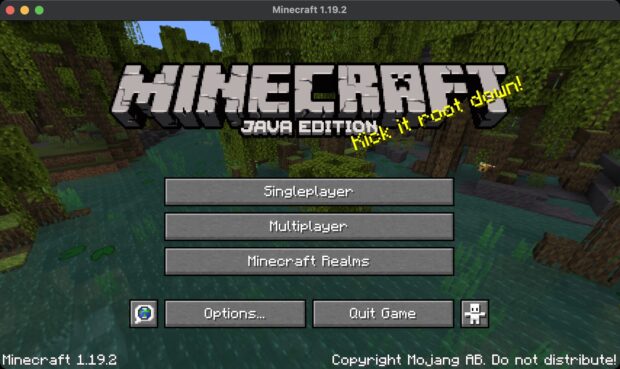
In this Minecraft tutorial, I am using Minecarft Java Edition 1.19.2 for the macOS. But these simple commands will probably work with other versions and platforms. Please post a comment below if you have any questions.
Open A Minecraft Map
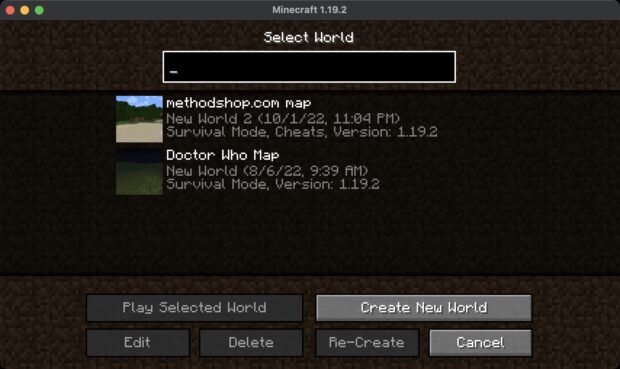
In Single Player mode, choose a Minecraft Map. If you are playing with a friend in Multiplayer, then make sure you enable cheats when you start the LAN game.
If you are new to using Command Blocks, then you may want to experiment with a test map before you risk messing up your main Minecraft Map.
Enable Minecraft Creative Mode
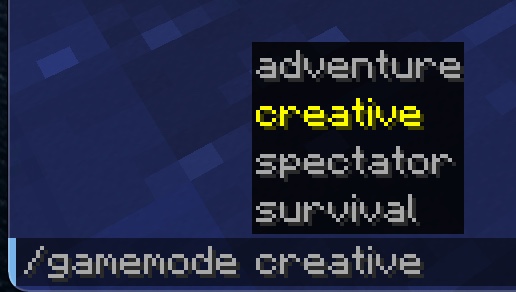
After you open your Minecraft Map, make sure that you are in Creative Mode. Type the SLASH key (“/”) and type in the following in the Minecraft Chat:
/gamemode creativeGather Materials In Your Inventory
These are the Minecraft Blocks that you will need for each teleportation site. Add them to the bottom row of your inventory.
- Pressure Plate – Any color or kind, it’s up to you.
- Building Block(s) of your choice. If you are building the Tardis from Doctor Who, then you probably want some blue colored boxes.
- Iron Door – The Iron door is a great choice since it’s Redstone activated and will automatically open/close when placed next to a Pressure Plate.
Give Yourself A Minecraft Command Block

Because Minecraft Command Blocks can be dangerous when used improperly, you won’t find them in the standard Minecraft inventory screen. You’ll need to use the Minecraft Chat bar to give yourself a Command Block.
Make sure that you have at least one empty slot in the bottom row of your Minecraft inventory. Press the SLASH key “/” on your keyboard to access the chat interface and type the following:
/give @p minecraft:command_blockThe Command Block will then get added to your Minecraft inventory.
Choose Your Minecraft Teleport Locations
You will need (2) sets of locations for this tutorial:
- Your origin block, which we will call X1 Y1 Z1
- Your destination block, which we will call X2 Y2 Z2
Explore your Minecraft Map looking for ideas for your origin and destination locations. Every block in Minecraft has a set of XYZ coordinates. Once you find a location, press F3 on your keyboard (or Function F3 depending on your keyboard’s layout). An overlay will appear that displays your three dimensional X Y Z coordinates on the map.
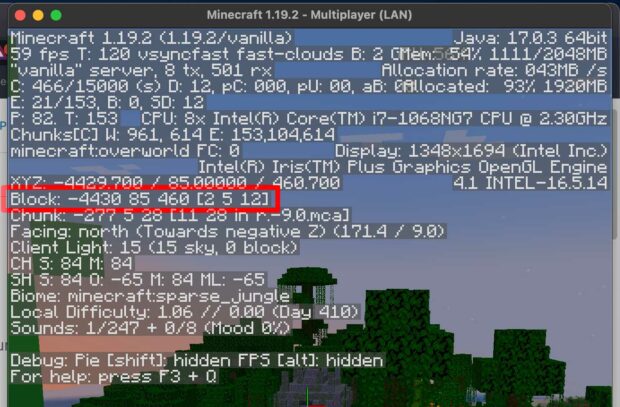
You specifically want your “Block” coordinates. In this example, I found a Block with a view of booby-trapped ancient ruins in the distance. They reminded me of the Temple Of Doom from Indiana Jones. This will be my destination. My XYZ coordinates for the block that I am standing on with the view of the ruins is:
- X: -4430
- Y: 85
- Z: 460
I already know what my home base location is:
- X: -1
- Y: 70
- Z: 03
Write down your two sets of XYZ coordinates.
Build A Particle Emitter At Your Destination Block
Let’s get fancy. To make our Minecraft teleport experience more fun, we are going to add a particle emitter that constantly spews purple sparkles into the air.
- Dig a (1) block hole in the ground and fill it with a Command Block. It doesn’t matter how you place the Command Block what direction its arrow is facing.
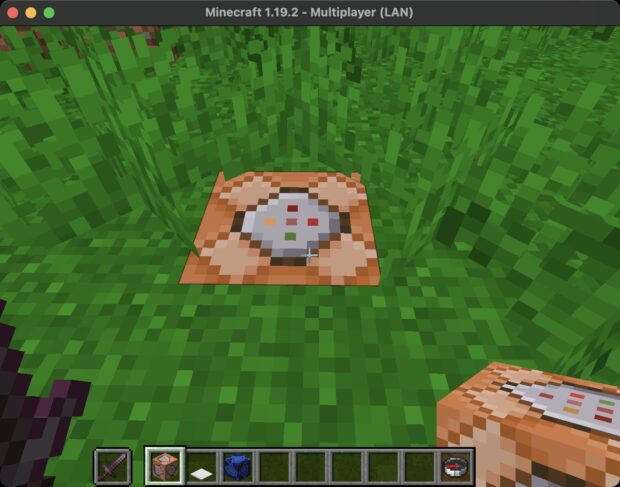
- CONTROL+CLICK on the Command Block and then type the following in the Console Command field:
/particle portal ~ ~ ~ 0 1 0 .7 35 forceThe squiggly-looking tilde symbol “~” on your keyboard tells Minecraft to use the exact location of the Command Block for your command. In this example, I could type in the XYZ coordinates of the Command Block instead of tildes and get the same result.
/particle portal -4430 85 460 0 1 0 .7 35 force- Then set the buttons to: Repeat, Unconditional, Always Active. The block should turn purple and purple sparkles should be emitting from the block. Pretty!

If you did everything correctly, you should see lots of purple particles coming out of the Command Block.
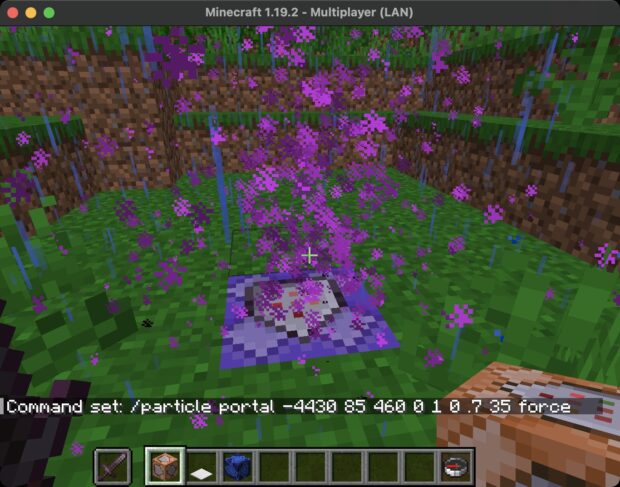
If you don’t like the look of the Command Block, then you can cover it with a Carpet or Pressure Plate block. You can also hide this Command Block anywhere on your Minecraft Map. It will generate particles at any set of XYZ coordinates that you specify.
You can also experiment with different types of particles in Minecraft like smoke, ash, snow, sparks, etc…
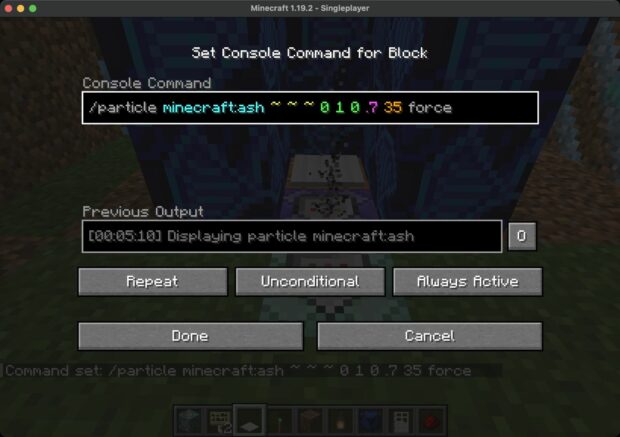
Create A Sound Effect Block
Directly in front of your particle emitter block, dig another hole and place another Command Block into the hole.
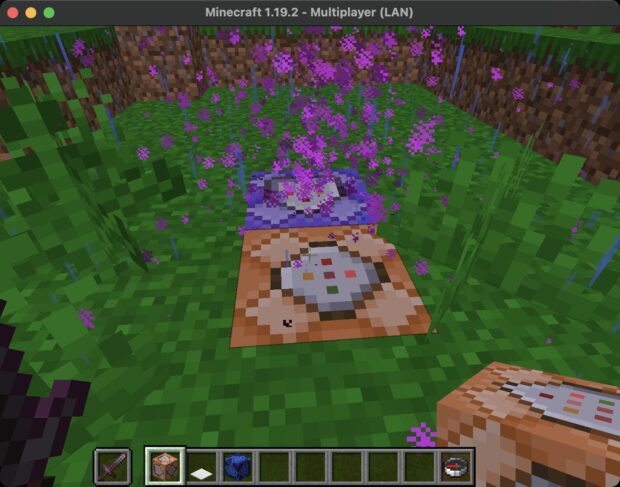
CONTROL+CLICK on this Command Block and type the following:
/playsound minecraft:entity.enderman.teleport hostile @pChange your button settings to: Impulse, Unconditional, Needs Redstone. The block should stay orange colored.
Then select a Pressure Plate from your inventory and SHIFT+CONTROL+CLICK on this Command Block. You can’t add another block on top of a Command Block without pressing SHIFT first. This will add a Pressure Plate on top of the Command Block.
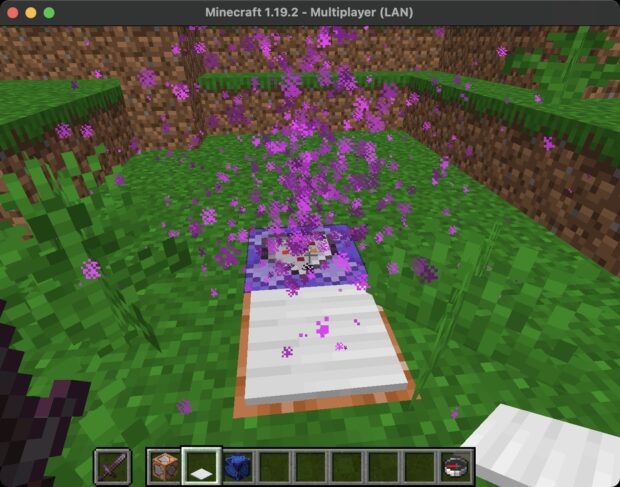
Now try walking on top of the Pressure Plate. You should hear a teleport sound effect. Cool!
After you get more comfortable with these commands, you can experiment with other Minecraft sound effects.
Create Your Teleport Block
Dig another hole and add a third Command Block behind the other two. We will add a Pressure Plate to this block that activates the teleport command.
WARNING: You don’t want to teleport directly between your origin and destination blocks, otherwise you will create an infinite loop. That is not good! You might get stuck and make your Minecraft Map unplayable.
To avoid creating an infinite teleport loop, we are going to slightly modify where we teleport.
Take your X1 Y1 Z1 coordinates and add 5 to the Y coordinates. So for example, the XYZ of my home base is -4 70 03. After I add +5, my new coordinates are -4 75 03. This will teleport my Minecraft character 5 blocks higher in the air so I land on top of the TARDIS.
CONTROL + CLICK on the Command Block and type the following into the Console Command field:
/tp @p X Y ZIn my example, I typed the following:
/tp @p -4 75 03Then set the buttons to: Impulse, Unconditional, Needs Redstone. The Command Block should stay orange colored.
Select another Pressure Plate from your inventory and SHIFT+CONTROL+CLICK on top of this Command Block to add a Pressure Plate.
But before you test this teleporter, make sure to press F3 and take a note of your current location. You never want to teleport somewhere without knowing where you are first. Otherwise, you might not be able to go back.
When you walk on top of this Pressure Plate, it will teleport you back to your origin location. Go ahead and test it out.
Decorate Your Custom Minecraft Portal To Look Like The TARDIS From Doctor Who
Build a decorative structure around your custom Minecraft portal. For this tutorial, I built a blue British police box around my teleporter. But this can be anything from a Goa’uld Chappa’ai from Stargate, to a small closet inside your Minecraft house. It’s up to you.
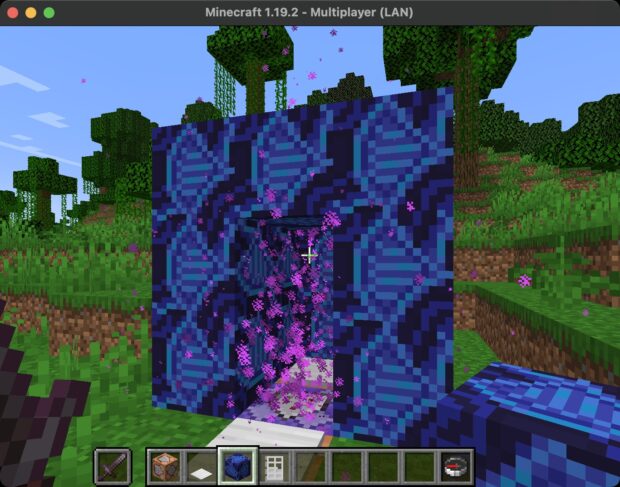
And since Pressure Plates create Redstone power, you can add an Iron Door to your TARDIS that automatically opens when you stand on the plate. How does it look?
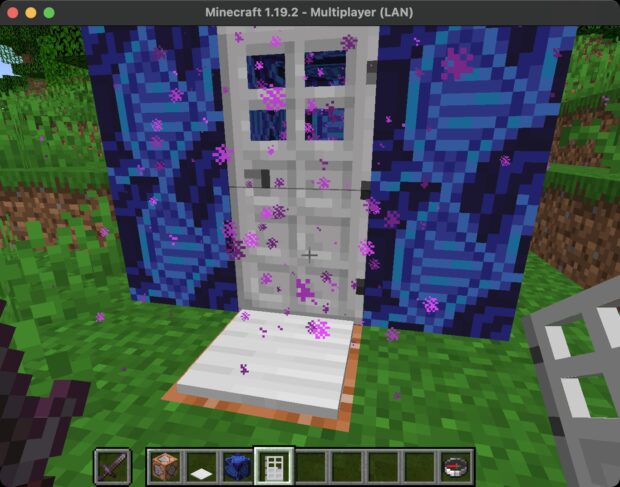
Test Your Custom Minecraft Portal

Are you ready to test your custom Minecraft portal? Here’s how the final product should work:
- Walk on top of the front door Pressure Plate. Sound effect plays and door opens automatically.
- Walk inside the TARDIS and stand on the Pressure Plate inside the structure.
- The Player get teleported to a new location.
If something didn’t work, then double check your Console commands and how the buttons were set. Those are the most obvious opportunities for a mistake.
Advanced Custom Minecraft Portals
In our simplified MethodShop tutorial, we used Minecraft Pressure Plates to trigger a sound effect and teleport commands separately. This is an easy example, but there are more advanced ways to do this using chained Command Blocks. Check out this page from The Red Engineer for a custom portal tutorial for more advanced Minecraft players.
Personally, I didn’t have much success using these advanced techniques. I tried for hours and even accidentally got stuck in an infinite teleport loop. By the way, if you haven’t backed up your Minecraft world lately, I suggest you do so ASAP.
Thanks for reading this Minecraft tutorial! Please post a comment if you have any questions or ideas on how to make this tutorial better.

Frank Wilson is a retired teacher with over 30 years of combined experience in the education, small business technology, and real estate business. He now blogs as a hobby and spends most days tinkering with old computers. Wilson is passionate about tech, enjoys fishing, and loves drinking beer.




 Caught On Video: Old Man In Suit Performs Amateur Parkour Jumping Stunt Across New York City Rooftops
Leave a Reply
You must be logged in to post a comment.