We’ve all seen time-lapse video before of things like flowers blooming, fireworks, road trips or the Northern Lights. But have you ever created your own? Probably not. The complicated equipment and skills required usually left time-lapse photography to the pros. But the TimeLapse app ($1.99, Apple App Store) lets any iOS device with a camera (iPhone, iPad, iPod Touch) easily create their own time-lapse photo sequence.
Making Your First Time Lapse Video
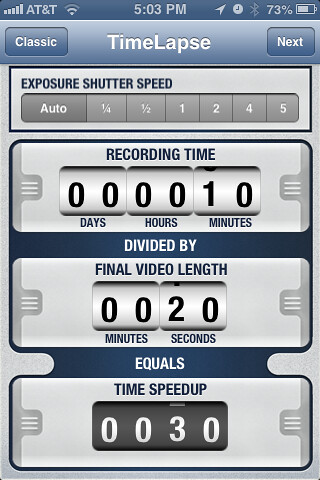
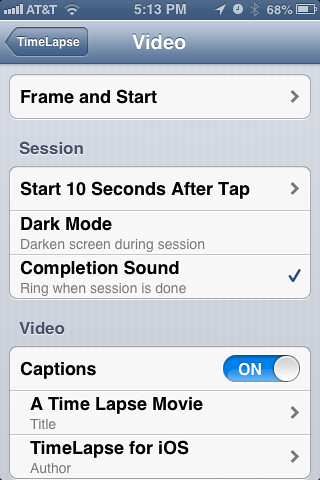
Using the TimeLapse App is easy. Just download and launch the TimeLapse app from the App Store ($1.99). The first screen will ask you to select your recording time, final length of your video and exposure shutter speed (pictured left). The second screen gives you the option to add a caption to your time-lapse video and select an audio track. That’s right, you can add audio and make your own time-lapse music video. When you’re ready, just tap on the “Frame and Start” button (pictured right).
After the time you specified in the recording time, a “ding” noise will sound. This means your file is ready, and it’s been saved to your iOS device’s Camera Roll along with the rest of your photos and videos.
Tips, Tricks & Recommendations
The TimeLapse app requires storage space, time, a steady position and power. It helps to plan ahead. Here are some recommendations:
- Power: If you plan of shooting a video beyond the life of your battery, you’ll need somewhere to plug-in your iPhone, iPad or iPod Touch. Powered locations, like your car (see video above) are ideal.
- Storage: You should also plan on cleaning out your photo library and deleting unnecessary files. TimeLapse works by taking lots of still photos, saving them within the app, and then stitching them together. If you have an old iPhone laying around, this might be a great use for it.
- Time: The whole point of a time-lapse video is to quickly show the passage of time. Make sure you, your environment and your subject are prepared for several hours of shooting. For example, you might want to have lights prepared for indoor shoots.
 Position: Unless you plan on staying perfectly still for several hours, you should use a stand or tripod for your time-lapse video. You can get a simple stand for your iPhone for just a few dollars. Or in you’re in a pinch, 2 black paper binder clips will work (pictured right).
- Interruptions: Turn on Airplane Mode on to avoid phone calls, text messages, etc. And if you have any calendar reminders setup, you should probably turn them off. One silly interruption can ruin your time-lapse video.
Final Thoughts
That’s it. The TimeLapse app is well worth the $1.99 price tag and is sure to help you create some fun time-lapse video files. You can download it from the App Store here: TimeLapse app ($1.99). I’m already making plans to time-lapse both Thanksgiving dinner and Christmas morning. If you make any fun time-lapse videos, please share them and post links in the comments below. Thanks!
Via matteo wyllyamz
I’m a dog owner that loves poetry, vampires, mountain biking, and cosplay. I’m open to ideas and still trying to figure my SFO life out one blog post at a time. LF ISO SWF GSOH SI DDF.


 Matt Damon Wants to Wish You a Happy World Toilet Day (NSFW)
thx! just instaled it!