Here’s how to open WebP files in Photoshop for both Mac and PC computers and convert WebP to JPG, PNG, and other file types.
Every time you load a webpage from the Internet, the images on that page are typically in PNG, GIF, and JPG file formats. All of these file types have existed for decades and there’s plenty of support for them at both the computer application and operating system levels.
But there’s a newer file format called WebP that’s becoming more popular online. Created by Google in 2010, WebP images look just as good as JPEG, but are usually 25% smaller. So, how do you create and edit WebP files? Here’s a tutorial on how to open WebP files in Photoshop and convert WebP to JPG, PNG, and other common file types.
Requirements:
- Adobe Photoshop ($99-$250)
- (1) or more images files
- 5-10 minutes of free time
How To Open Webp Files in Photoshop – Tutorial
If you’re reading this tutorial, then you have probably already tried opening some WebP images in Photoshop. It won’t work. The application can’t read WebP files without installing a Photoshop WebP plugin first.
Download Google’s Adobe Photoshop WebP Plugin
Download the official Google WebP plugin for Adobe Photoshop from the Google Developers WebP website. There are other versions of WebP plugins versions available online, but it’s probably best to stick with the official plugin from the company that invented the WepP file format, Google.
Install The WebP Plugin
After you download the WebP plugin, then you’ll need to uncompress it and put it into the Adobe Photoshop plug-in folder.
How To Install An Adobe Photoshop Plug-in (Mac)
- Copy the plug-in file called “WebPShop.plugin” into your Photoshop plug-in folder located here: Macintosh HD > Applications > Adobe Photoshop > Plug-ins
- If you don’t see a plug-in folder in the Adobe Photoshop folder, then you can try to create a folder called “Plug-ins” and place your plug-in in that folder. Another option is to right-click on the Adobe Photoshop application and select “Show Package Contents”. Then navigate to Contents > Plug-ins and move your WebP.plugin folder into there.
How To Install An Adobe Photoshop Plugin (PC)
- Copy the plug-in file called “WebPShop.8bi” into your Adobe Photoshop folder, usually located here: C: > Program Files > Adobe > Adobe Photoshop > Plug-ins for x64
Restart Photoshop
After you install the WebP plugin, then you’ll need to restart Photoshop before you can open and save WebP files.
Open A WebP Image File
The “Open” and “Save” menu commands in Adobe Photoshop should now show WebP options. Try opening some WebP images. Unlike before, they should open successfully in Adobe Photoshop. If you don’t already have a WebP file, then just open any image file and skip to the next section.
Export WebP To JPG, WebP To PNG, Or Other Formats

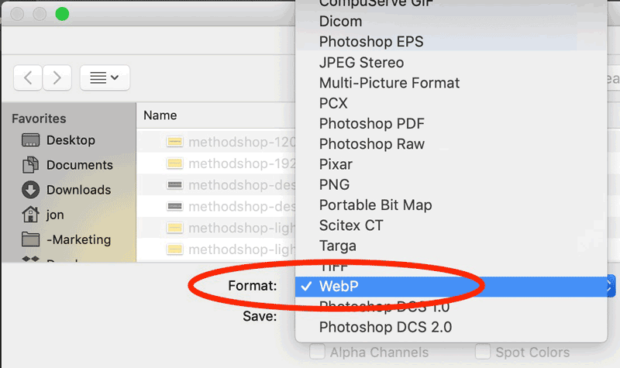
After you successfully install the plugin, you’ll be able to both open and export WebP files. From the File menu in Photoshop, select “Save as…”. Then use the dropdown menu to select WebP or whatever file type you want.
Adjust Your WebP Image Settings

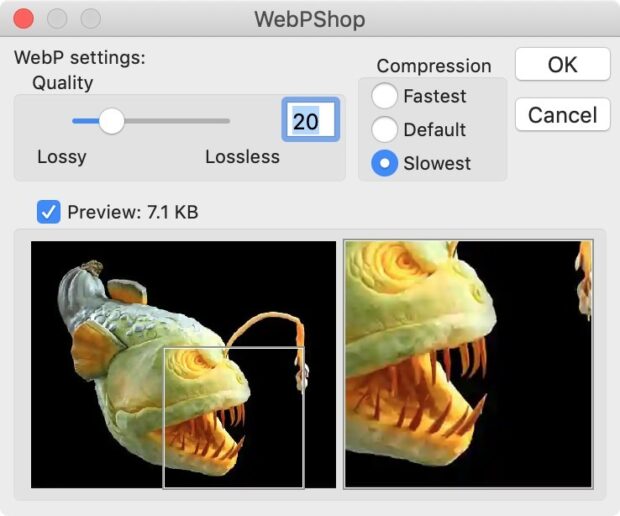
For now on, when you choose WebP as a “Save as…” option in Photoshop, you’ll be presented with an additional menu of WebP file settings.
- High-Quality Photography: If you’re compressing photography or luxury product shots, then ~70 should be a good quality setting fo you.
- Regular Images: For everyday images, 20-30 should work. Most of the WebP images on this website are around 25 quality. Do a few experiments until you find a setting that works best for your images.
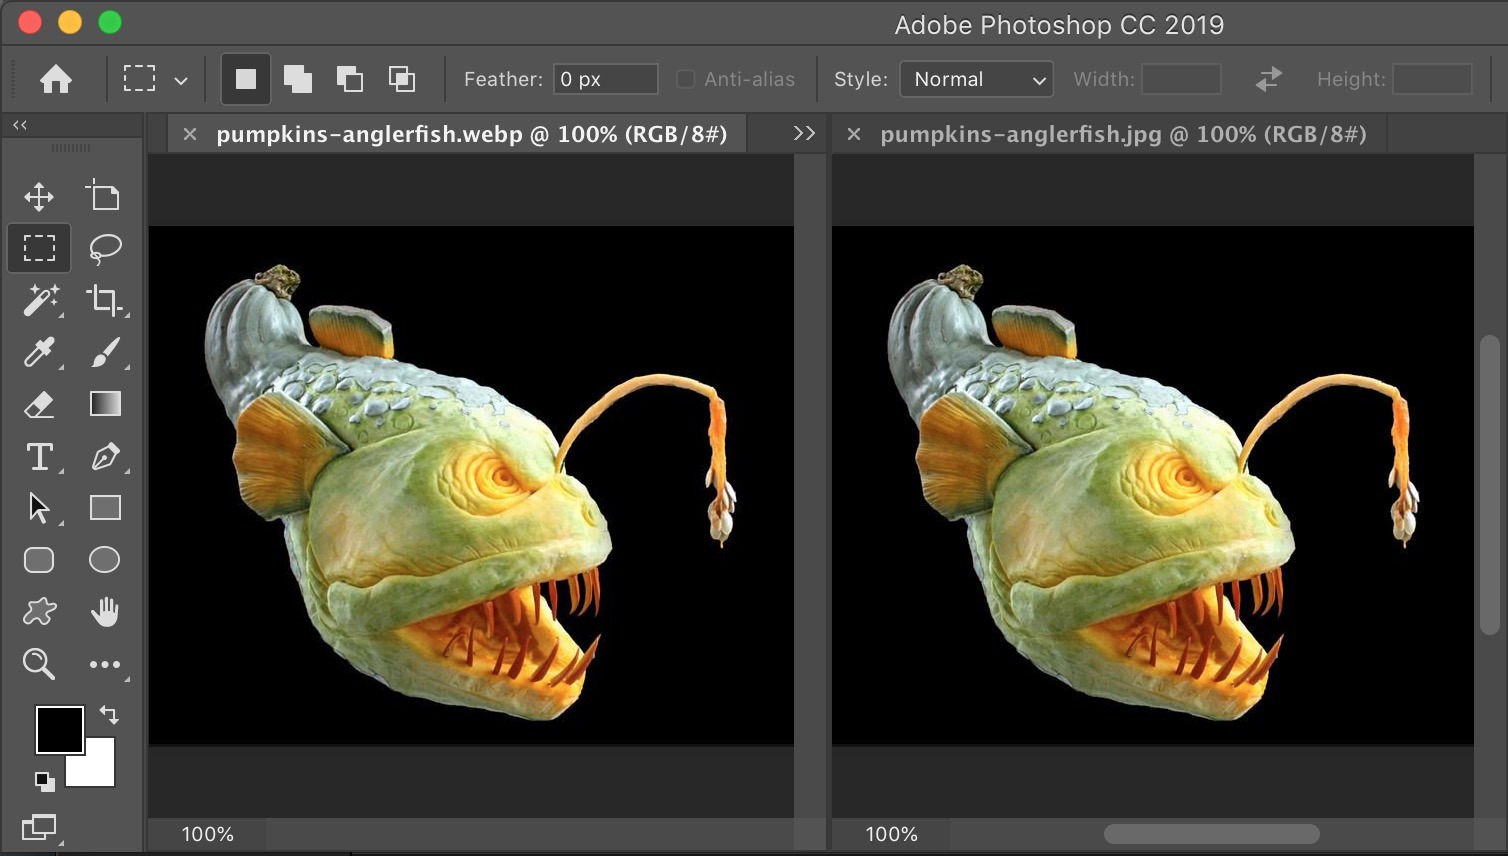
Here’s a photo comparison between a 100k JPG and a 7k WebP file. Can you tell the difference when comparing WebP to JPG?

NERD NOTE: Part of the reason the WebP file format has had such a slow adoption rate is because of the critical claims against the technology by influential people from the Internet community. In 2013, Josh Aas from Mozilla Research released a comparison between WebP and JPG. He was unable to show that WebP outperformed JPEG by any significance.
WebP Files To JPG: How To Convert WebP To JPG Without Photoshop
If you don’t have access to Adobe Photoshop, don’t worry, there are other options. Several websites, including Thumbtube, will allow you to upload an image and have it converted for free. You, of course, won’t be able to edit or manipulate your images without Adobe Photoshop, but if you just need to convert an image from the WebP file format, then that should do the trick.
Issues With Using The WebP File Format In WordPress
Although WebP images are becoming more common, they still haven’t reached mass adoption. Case in point, the popular blogging platform WordPress doesn’t natively recognize WebP files! That’s right after you go through the trouble of creating WebP files for your website, you can’t directly upload them into WordPress. You have to install a WebP WordPress plugin first. An annoying extra step, but worth the trouble.
Here's how to open WebP files in Photoshop for both Mac and PC computers and convert WebP to PNG, JPG and other file types ... #WebP #GoogleWebP #WebDesign #WebDevelopment Share on XRelated Articles:
- Famous Works Of Art Photoshopped With Apple AirPods
- Missing Missy: The Lost Cat with a Photoshop Battle
- BP Caught Photoshopping Deepwater Horizon Oil Spill Photos
- How To Convert EPS to PDF Using Adobe Illustrator – Tutorial

Frank Wilson is a retired teacher with over 30 years of combined experience in the education, small business technology, and real estate business. He now blogs as a hobby and spends most days tinkering with old computers. Wilson is passionate about tech, enjoys fishing, and loves drinking beer.


 13 Inspirational Forrest Gump Quotes That Will Warm Your Heart
WebP has such a nuance – not all browsers support it. For example, iOS Safari, regular Safari, IE – do not support WebP. https://caniuse.com/#feat=webp Therefore, you must always store at least two versions of each image. Webp (for WebP-enabled browsers) and original image. And give the right version depending on the browser. And the original image must also be optimized/compressed – so that even for browsers without WebP support, images will be optimized (lighter in weight) – this is the third! version of the file.. At the optipic service, I recently noticed a new functionality in which all of this is already in the box. https://optipic.io/en/cdn/ You can even connect everything so that the urls of the images do not change (they remain exactly the same and look like internal urls on my site). But in fact, they are loaded through their system with automatic compression, conversion to webp and recognition of webp support. It turns out that everything is simple and beautiful, and inexpensive))