Want to talk to your computer and have it type for you? Setting up a speech to text Mac shortcut is easy to do and doesn’t require any additional Mac dictation software. The macOS already has voice to text natively built into the operating system. Here’s an easy speech to text Mac shortcut tutorial for beginners.
Table of Contents[Hide][Show]
How To Use Speech To Text On macOS
To use speech to text on macOS, you first need to turn it on. This is a very easy tutorial. If you are very Mac savvy, then just enable the Dication feature under the Keyboard setting in System Preferences. Or follow the steps below. Let’s begin!
Open System Preferences
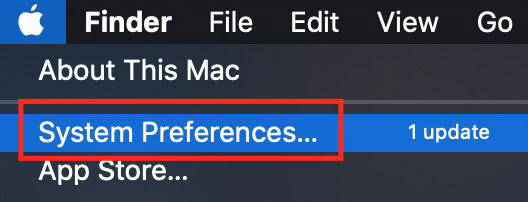
On your Mac, choose the Apple menu in the top left of your menu bar and select System Preferences from the drop-down menu.
- Apple > System Preferences
Keyboard Options
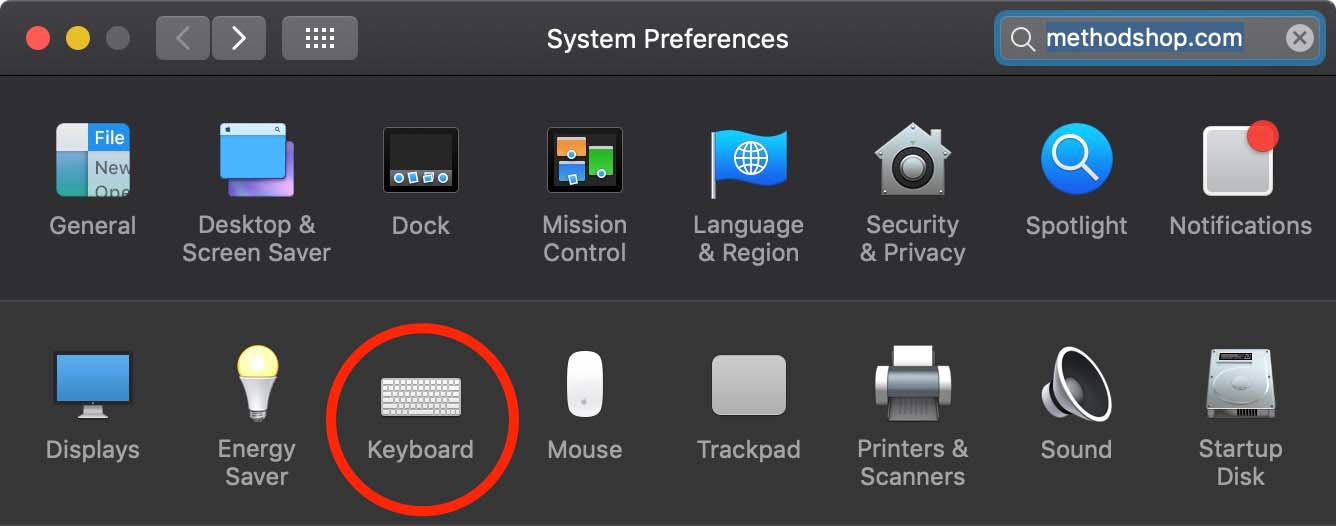
After you open the System Preferences panel, you’ll see a collection of preference icons. Select Keyboard.
- System Preferences > Keyboard
Dictation & Language Selection
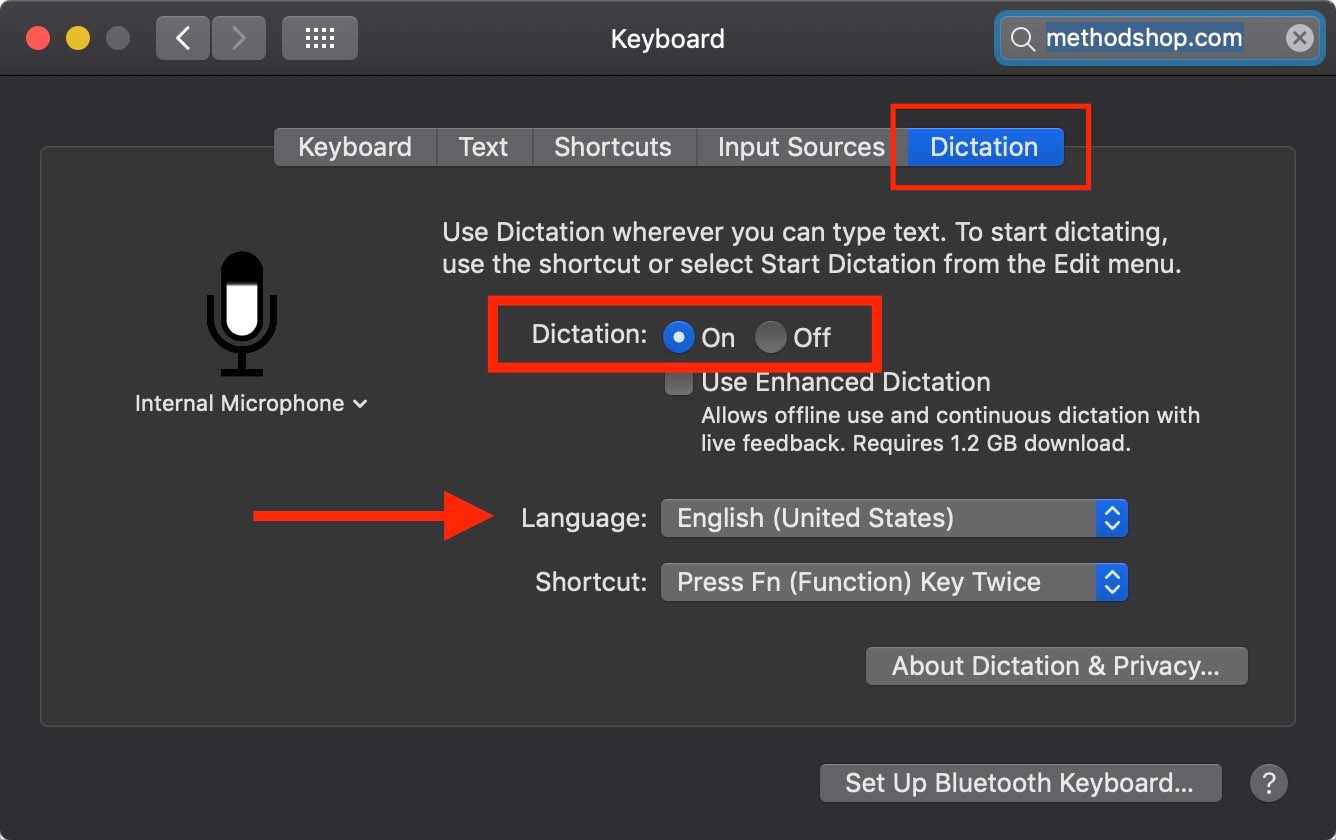
There are several sub-options under the Keyboard‘s Dictation submenu: Keyboard, Text, Shortcuts, Input Sources, Dictation.
- Click on the Dictation sub menu.
- Turn on Dictation.
- If you’re asked if you want to improve Siri and Dictation, click Not Now.
- Choose a Language. To dictate using another language besides English, click the Language pop-up menu, then choose a language and dialect.
- Apple > System Preferences > Keyboard > Dictation > On
Enhanced Dication & Offline Access
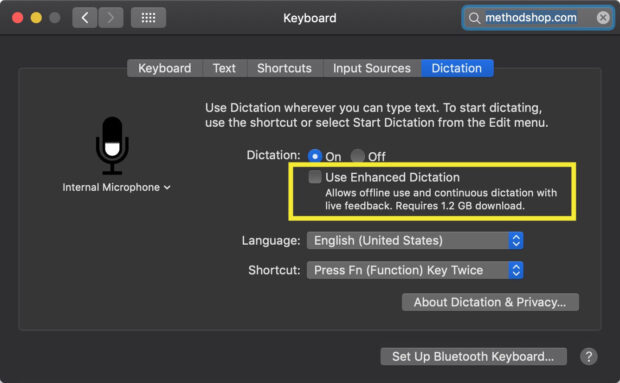
Enhanced Dictation is optional. You can skip to the next step if you want.
Do you want the ability to dictate speech to text without an Internet connection? Depending on your installed version of the macOS, you might be presented with an option to enable offline dictation. This could be useful if you are in an area with limited connectivity or want to use this feature while on an airplane.
Just be aware that this feature requires at least a gigabyte of hard drive storage. Make sure you have extra space for these files before trying to install.
- Apple > System Preferences > Keyboard > Dictation > Use Enhanced Dictation
Setup A Speech To Text Mac Shortcut
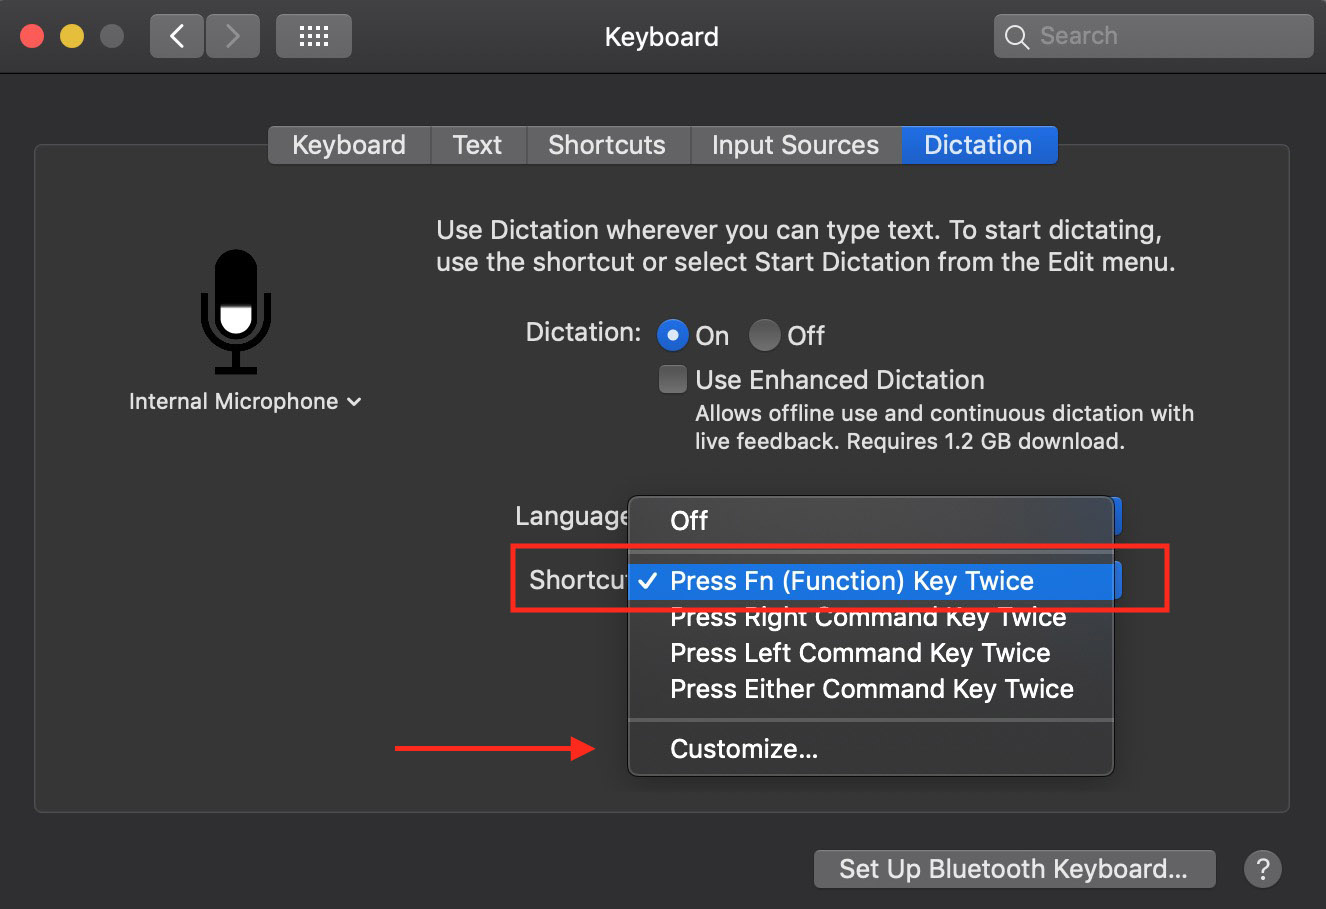
How do you want to tell your Mac to start listening for your speech to text input? The default Mac speech to text shortcut for dictation is to press the Function key twice. But you can use the Command, Control, or whatever keys you want. Just select Customize to change to the keyboard shortcut of your choice.
- Apple > System Preferences > Keyboard > Dictation > Shortcut
How To Dictate Text

Once you’ve enabled the Dictation feature and selected your keyboard shortcut, you can now start speaking into your computer and letting it type for you. Try using this speech-to-text feature to compose an email. You’ll be surprised how much time this feature can save you on a daily basis!
Place Your Mouse Where You Want To Start Dictating Text
- Open a document or locate a text field where you want to start dictating text.
- Click your mouse in the place where you want to start dictating.
Press Your Assigned Function Key Or Sequence
- Press the Function key twice (or whatever keyboard shortcut you previously selected).
- A microphone icon should appear with a fluctuating loudness indicator and make a chirp sound.
Start Talking
Once the microphone is active, your computer will start to turn your voice into text.
- Start talking. Speak clearly and only try to dictate in short bursts. Try one or two sentences at a time.
- When you’re finished dictating, press your keyboard shortcut key again.
macOS Speech To Text Tips
Here are some tips for using the speech to text feature on macOS:
- Speak clearly and slowly. If you speak too fast, or mumble, your dictation results will be bad. Going back to re-edit everything isn’t worth the time. Just do it right the first time.
- Speak in smaller chunks. Don’t try dictating a college commencement speech in one try. The Mac speech to text function isn’t made to listen for long periods of time. Smaller sections that are 60 seconds are less work best.
- Avoid background noise. If possible, move to a quiet area. Background noise can cause unpredictable results with the Mac dictation software.
- Speak punctuation marks as needed. If you want to end a sentence, then just say “period” or “questions mark” and the dictation software will add that punctuation for you.
- Create new lines or paragraphs. To create a new line or a paragraph break, just say “new line“ or “new paragraph“.
- Use a professional external microphone. The default microphone on your MacBook will work fine for most users. However, if you are having issues with your dictation results, you can try using an external microphone like the(Amazon link) Blue Yeti ($99+).
Hi, I’m Zack Applegate. I’m a technology writer at MethodShop. Please check out my articles on a variety of topics, including artificial intelligence, music, movies, and silly tech stuff like funny Elon Musk jokes and rock bands with weird names. If you have article ideas, please connect with me on Facebook.




 55 Funny Pirate Pick Up Lines (That Will Jolly Your Roger)
Leave a Reply