We all know one of the weak spots of Apple computers is the audio output jack. This 1/8″ stereo mini-plug is where we connect our speakers and/or headphones to listen back to programs ranging from iTunes and Safari to Garageband and Logic. While the jack does double as an optical output (where you would need an optical cable), the majority of users connect in an ‘analog’ fashion.
But what if you could find a relatively inexpensive interface that could easily convert that analog signal to a higher quality digital output for all your apps? Well, the sleek, portable aluminum-cased Apogee Duet ($495) may just be the answer.
- Two channels of Apogee D/A and A/D.
- Stereo Headphone output and I/O LED metering.
- Stereo XLR Inputs, 1/4″Instrument Inputs, 1/4″ Outputs to speakers.
- +48V for mics that need Phantom Power.
- Powered/connected by an included Apogee Duet FireWire 400 cable.
- Large rotary knob controls both output volume and mic preamp levels, as well as muting function.
- Two Channels of Apogee mic preamps with +48V phantom power, phase reversal and up to +75dB of gain.
- Works with Apple computers only at 44.1, 48 and 96kHz sample rates
The Apogee Duet DAC (Digital to Analog Converter)
About the size of a small video cassette, the Apogee Duet is actually a stereo DAC, or Digital to Analog Converter, with a few extra twists up its sleeve. Also known as a D/A, it takes the digital output of the Mac, and through the use of a much higher-end chip than your computer has, converts the signal to analog. It’s powered and connected simply by hooking up the included Apogee Duet FireWire 400 cable to your Mac, running OS 10.4.10 or greater.
Installation And Setup
Both the installation and setup was simple. I connected the FireWire 400 cable from Duet to my MacBook Pro and plugged in some headphones. A green OUT LED lit up under the large rotary knob indicating the unit was powered on.
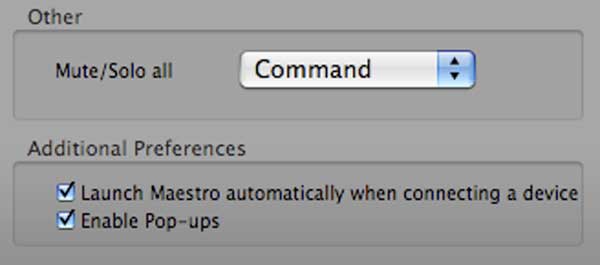
Once connected, Maestro software (more on that below) automatically launches asking if I would like to choose Duet for Mac for the sound I/O. That can be disabled, however, by deselecting ‘Launch Maestro automatically when connecting a device’ at the bottom of the Maestro Preferences menu.
The Apogee Duet Break Out Cable
Duet features a stereo 1/4″ headphone jack on the front, which is where you plug in your headphones. While you could connect your speakers to this jack (via a 1/4″ Y-cable), Apogee provides a custom breakout cable that connects to the I/O (In and Out) at the rear top of the unit.
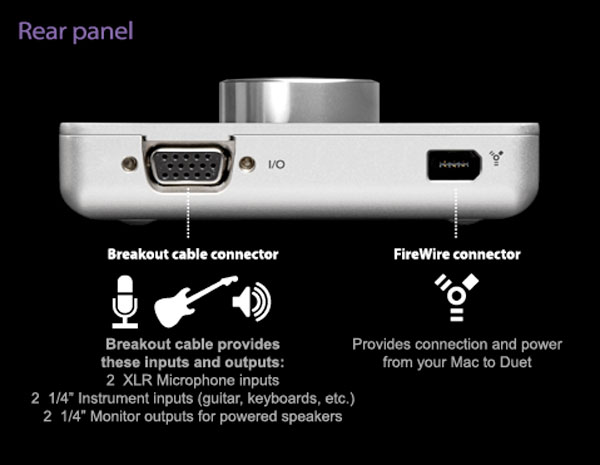
On the breakout cable resides a pair of 1/4″ unbalanced –10 dBV Outputs, which is where you hook up your monitors (so you can use the headphone jack for headphones). The cable also features two balanced XLR Inputs for microphones and two 1/4″ unbalanced Hi-Z (impedance) Inputs for instruments (guitar, bass, keys, etc).
This breakout cable is the only thing I don’t like about Duet. All the connections are white plastic and it feels kind of cheap. I see an opportunity for a higher-end cable company to build a product here! While it works fines and I certainly understand the need for it, it could be better.
Multi-Purpose Knob
Atop the Apogee Duet sits a large, multi-purpose rotary encoder knob. By pressing on the knob and cycling through the choices, you can select from either mic preamp channel (IN-1/IN-2) or the Output – all of which feature small LED’s that light up atop the unit when chosen.
When the knob is turned, the encoder screen pop-ups automatically, displaying either the chosen input, outputs, group or muting functions. Note that both the headphone and output levels are controlled by the knob simultaneously, and cannot be separated. The knob can also be used to reset Duet by pressing and holding it down for 5 seconds, or mute all outputs simply by pressing for a second or two.
Maestro: Apogee Duet Software
Also included in the package is a CD with the Apogee Duet software called Maestro. This provides control of the Duet settings, configurations, and low-latency mixing options. This is where you set your Input levels, select +48V phantom power or phase reversal, grouping, Output levels and even some advance muting functionality for monitoring while recording.
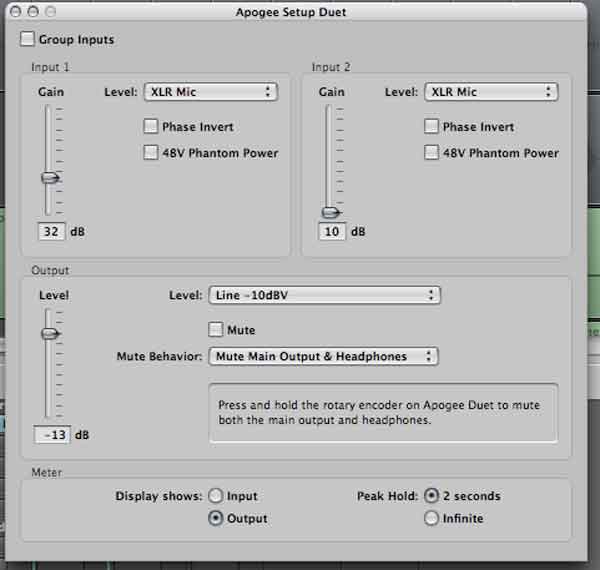
Maestro features direct integration with Logic, Soundtrack Pro and GarageBand, each of which has a Duet control panel built-in. For example, in Logic Pro (7.2.3 or greater), you can open Duet directly from the session at the Audio > Apogee Control Panel.
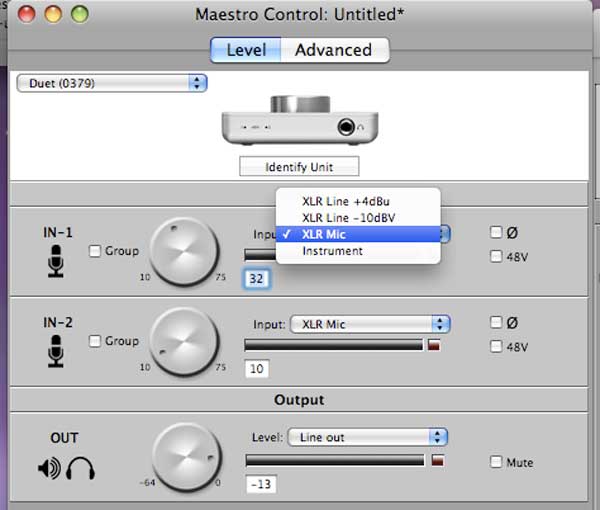
However, Duet (and Maestro) can be used with all CoreAudio compatible applications, as I ran it off my both my MacBook Pro laptop and Mac Pro tower with Reason, Live, and Peak. It won’t however, work with Digidesign Pro Tools (send Avid a letter!).
NERD NOTE: Apogee was founded in 1985 and initially made its name designing filters that solved many of the early problems associated with digital audio.
Sound Quality Tests
Once you have the Duet hooked up and the software installed, you might want to run a few sound quality tests. Here’s a YouTube video that will walk you through testing the audio output quality of music from your iTunes Library using the Duet.
Final Thoughts On The Apogee Duet
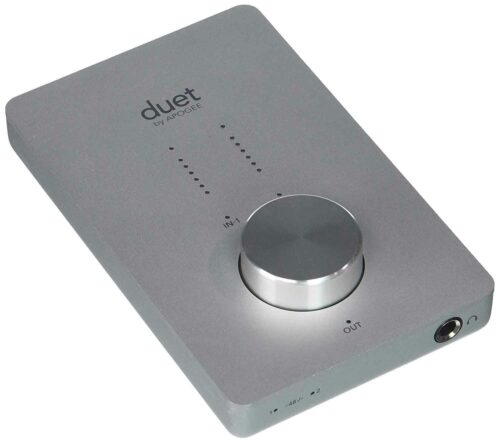
The Apogee Duet is an amazingly flexible tool. You can monitor audio apps and iTunes with it, connect it to speakers or your home theater, use it as a mic preamp, record guitars through it, control limited Midi with it and have it be the master volume for your system. Sounding far better than the Mac’s Audio Output, it’s portable enough to use at home or take with you on the road.
At $495 though, it’s not cheap. But with what it provides for that money, there’s nothing else quite like it on the market.
Related Articles:
- An Open Letter to the Music Industry RE: Lossless Audio
- The Shure E3C Sound Isolating Earbuds Are Totally Badass
- Is the Crosley Cruiser Portable Record Player Worth Buying?
- How Musicians Are Using the iPod In Their Professional Lives



 See Your Twitter Lifespan and Activity with Yappler
Leave a Reply
You must be logged in to post a comment.